Quick Start
Step 1: Connect Batteries
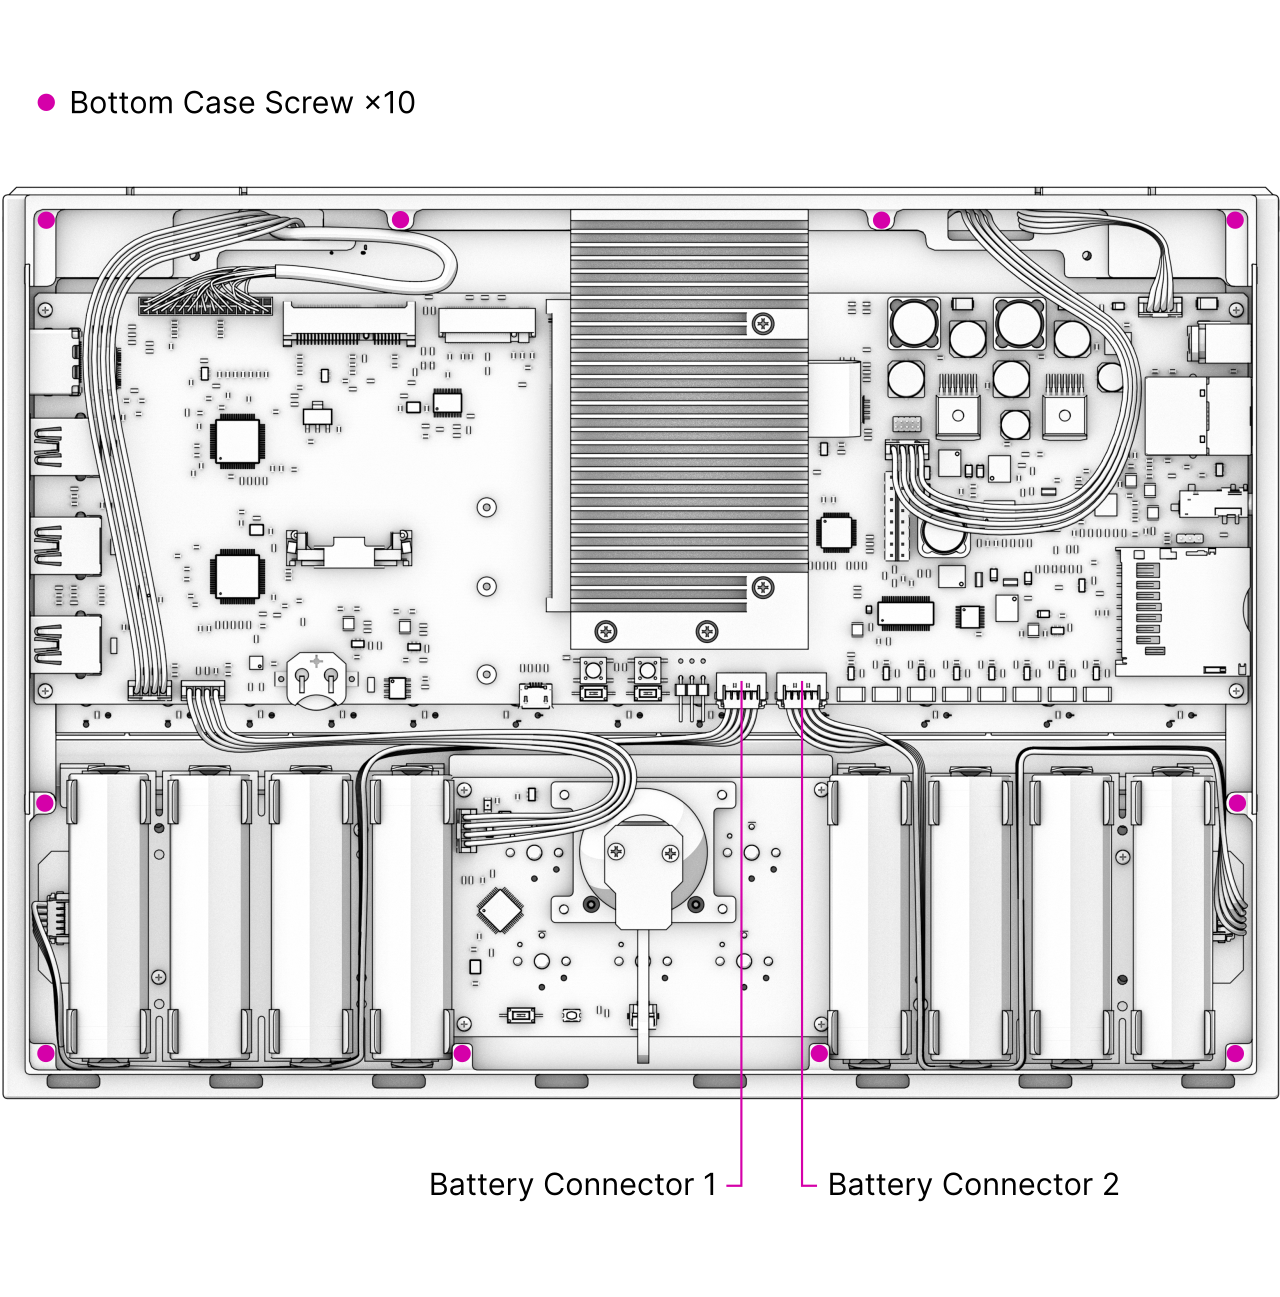
To prevent discharge during shipment, the battery cables are not connected by default. After reading about Safety in the previous chapter, unscrew the 10 bottom screws and remove the bottom plate. Attach the two battery cable plugs to the battery connectors on the motherboard, then reinstall the bottom lid.
Step 2: Turn On
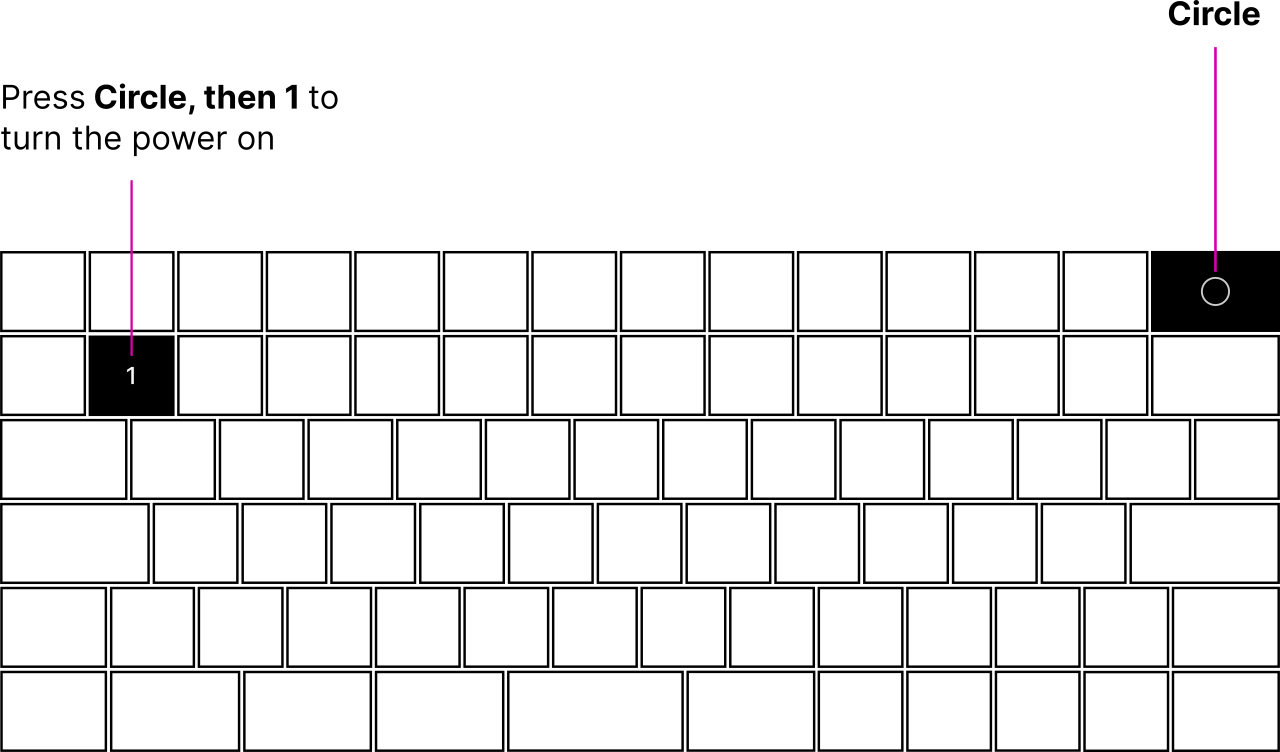
To turn Reform on, press Circle and then 1.
The Circle key is used for system control commands. When you press Circle, a menu of system control functions and their shortcuts will be displayed on the OLED screen embedded in the keyboard.
To save power, the status of the Circle key will only be queried once per second, so you need to press Circle for at least one second for the menu to show up.
Step 3: Log In
After being powered on, the main processor will boot the operating system installed on eMMC flash memory. The operating system’s kernel will show diagnostic information as it activates all the devices in the system until finally arriving at the login prompt. On first boot, the Setup Wizard will walk you through the configuration process. You’ll select your keyboard layout and your time zone, choose a desktop environment, and finally, create a user account. Once everything is set up, you can start installing software and using MNT Reform. If you are new to the Debian GNU/Linux operating system or want to learn about specifics of the system software shipped with MNT Reform, please refer to the chapters “Linux Console Basics”, “Graphical Desktops”, and “Software”.
The following chapter will introduce you to the input devices of MNT Reform.