Input Devices
MNT Reform Next comes with a keyboard and a multi-touch trackpad preinstalled.
Keyboard
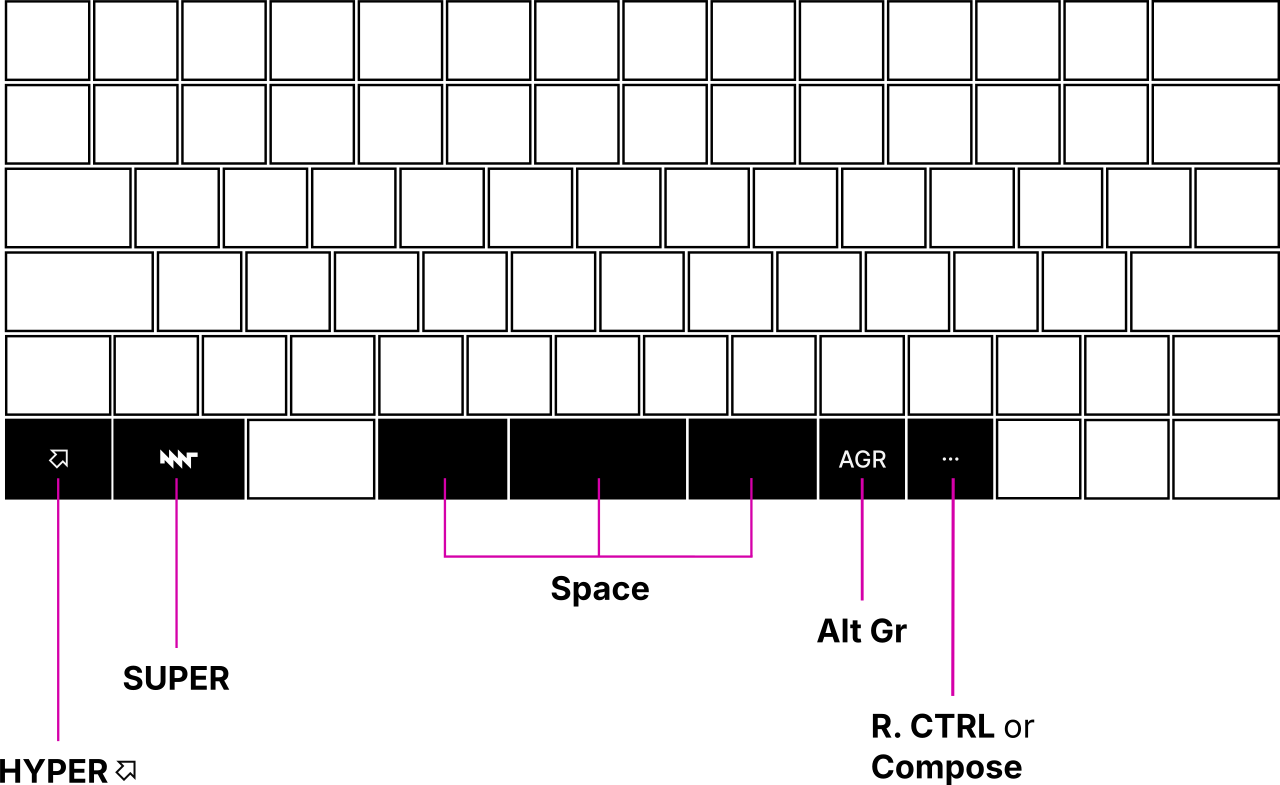
The keyboard layout is close to standard ANSI, with some non-standard choices. The biggest difference is the space bar, which is split into three large keys so it doesn’t have to be mechanically stabilized, and, if you’re an advanced user, you can remap two of these space keys to other functions.
Because many advanced users remap the traditional Caps Lock key to a different function, we swapped Caps Lock for a CTRL key right away. This makes the use of common CTRL key combinations more ergonomic.
Right next to the AGR key—short for “Alternate Graphic”—is a special key with 3 dots (an ellipsis). It is intended as a user-defined key, which is mapped to Right CTRL by default. We recommend remapping this key to Compose, a key that allows you to generate Unicode symbols from Compose sequences.
MNT Reform Next features an additional modifier key, the HYPER key, in the lower left. HYPER provides an additional layer of key combinations and “media keys”. Here is the list of shortcuts you can use with HYPER:
Shortcut |
Function |
|---|---|
HYPER+F1 |
Decrease Brightness |
HYPER+F2 |
Increase Brightness |
HYPER+F7 |
Previous Track |
HYPER+F8 |
Play |
HYPER+F9 |
Next Track |
HYPER+F10 |
Silent |
HYPER+F11 |
Volume Down |
HYPER+F12 |
Volume Up |
HYPER+← |
Home |
HYPER+→ |
End |
HYPER+↑ |
Page Up |
HYPER+↓ |
Page Down |
OLED Menu
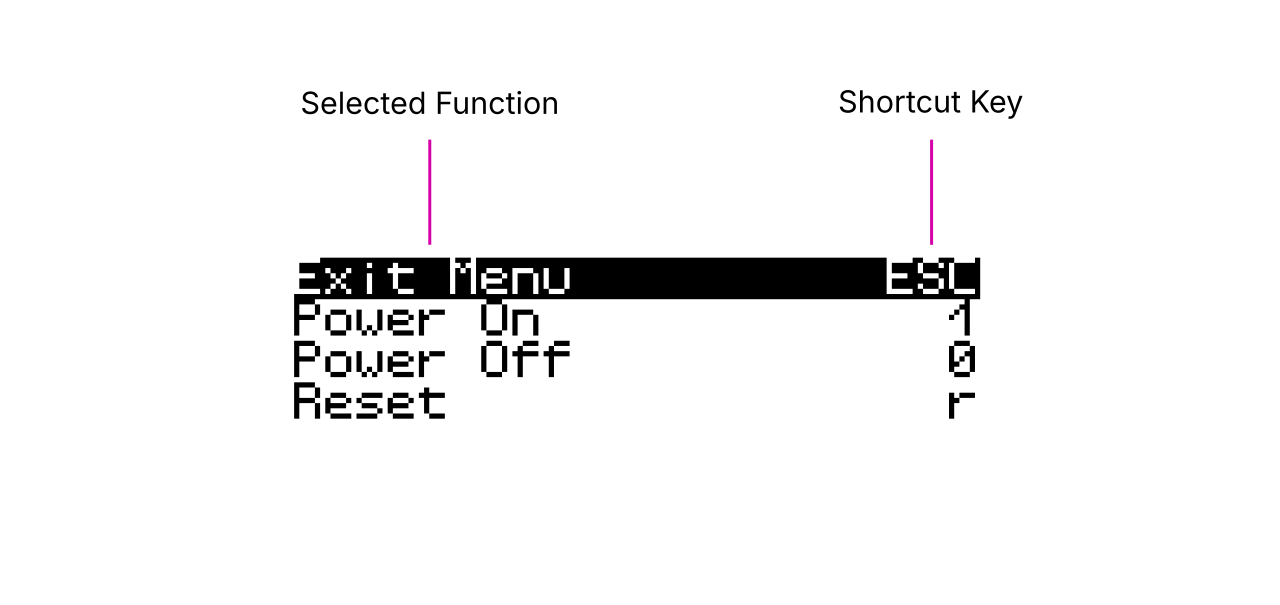
Another special key that you already encountered is the CIRCLE key, in the top right. This key is dedicated to power and system management functions that are completely independent from the operating system.
The keyboard has a built-in OLED display for interaction with the System Controller on the mainboard. Pressing the CIRCLE key activates a menu on this display. You can highlight an option and scroll through the menu by using the ↑ and ↓ keys. To trigger the highlighted option, press ENTER. Alternatively, you can press the shortcut key that is displayed on the right hand side of each menu option. For example, to show the Battery Status, press B when the menu is active. To leave the menu, press ESC.
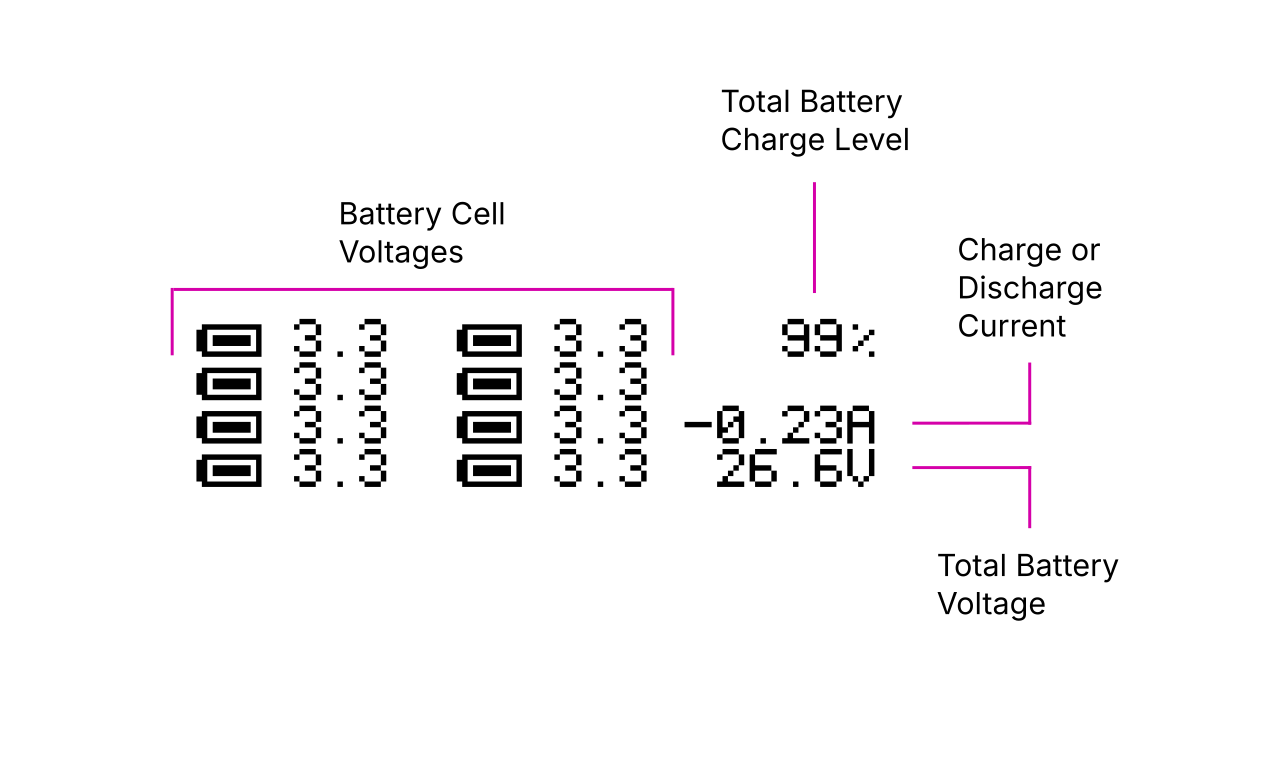
You can see detailed battery information including the estimated total charge percentage on the Battery Status screen available in the OLED menu. Each cell icon corresponds to one of the battery cells. The leftmost group of four icons represents the battery pack on the left side of the device, and the group on the right represents the battery pack on the right. The locations of of the battery icons correspond to the physical locations of the battery cells in the laptop.
Trackpad
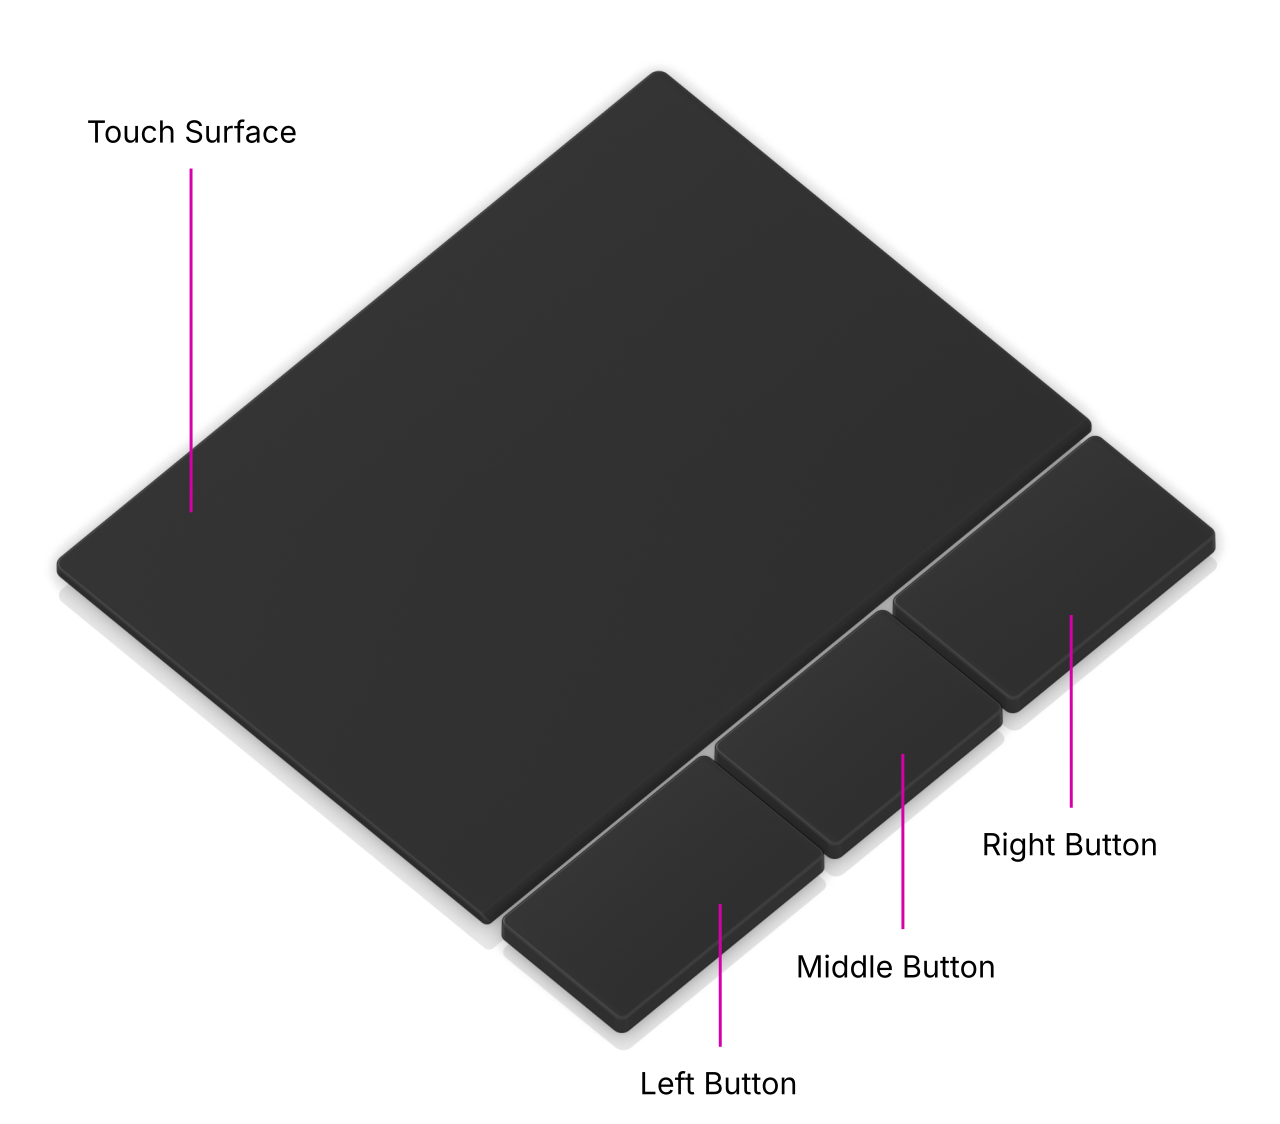
Slide one finger across the trackpad’s glass surface to move the cursor. Tapping with one finger acts like a left mouse button click. Slide two fingers across the surface to scroll in any direction, and pinch in and out to zoom. Tapping with two fingers performs a right click. The GNOME desktop also supports three-finger movements to switch between workspaces.
Below the trackpad surface you’ll find 3 mechanical buttons. These act like a computer mouse’s left, middle and right buttons, respectively.